We've all experienced it before: you're deep into your beauty rest, catching some Zs, when someone storms into your room to wake you up.
Growing up, it's your siblings.
In college, it's your dorm mates.
In adulthood, it's your children.
A good night's sleep is a vital for every person of every age, so we became inspired to create a product to help facilitate its success.
For the manufacturing of the Sleep Switch, we chose to use acrylic and 3D printing processes, secured by very sturdy hardware to ensure the durability of the piece.
For the manufacturing of the Sleep Switch, we chose to use acrylic and 3D printing processes, secured by very sturdy hardware to ensure the durability of the piece.
ME102 FINAL PROJECT-THE SLEEP SWITCH
CHLOE HUANG & SPENCER HANSON
MANUFACTURING PROCESS
For the manufacturing of the Sleep Switch, we chose to use acrylic and 3D printing processes, secured by very sturdy hardware to ensure the durability of the piece.
LASER CUTTER
The laser cutter was a core process of putting the Sleep Switch together. We completely used the laser cutter for prototyping, and used it for the back supportive plate of the final product, as well as for the spring shaft's washer and the decorative elements. Throughout this quarter, we became very comfortable with the laser cutter, so this process was not too much of an issue. The machine's efficiency and precision allowed us to reiterate ideas for trial-and-error, and was a core element in helping us make a perfectly rigid final product. It was also useful in its ability to raster for aesthetic elements.

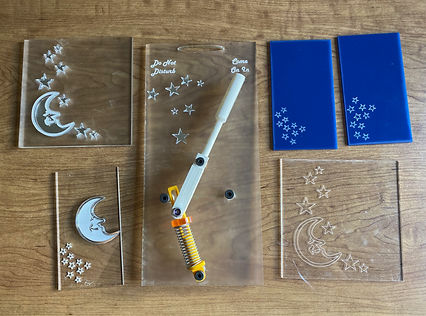
We laser cut a temporary back plate to test our mechanism's structure and dimensions when iterating through the final version of the product.
The laser cutter was wonderful for the decorative elements of the product. We laser cut stars and moons out of mirror acrylic,
After 3D printing a washer and slightly underestimating the interior dimensions, we decided that it would be much more efficient to laser cut one. Pictured above is the second of three washers that we laser cut.
3D PRINTER
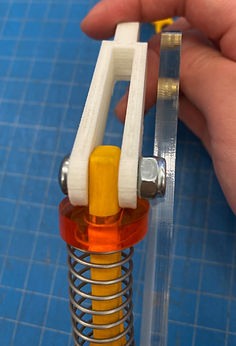
We used the 3D printer for the most crucial parts of the mechanism itself. Given the unique forms we needed for the lever and spring shaft, the laser cutter would not be able to create the three-dimensional parts we needed. Though we 3D printed 2 spring shafts, one lever, a washer, and a "Y" piece that would facilitate the mechanism, we only ended up incorporating the spring shaft and lever into our final project.
One problem that we encountered from our first time 3D printing was scaling. When creating our Solidworks files, we made all of the pieces exact measurements, just like we did on the laser cutter because we always laser cut with the assumption that it cuts a little more off. However, it seems to have been the opposite with the 3D printer. Because this machine adds material, rather than cutting it off, the measurements were truly exact, and our pieces did not fit together smoothly at times due to that. While we thought that we would have to rescale the CAD file and reprint the piece, we were able to simply sand down the part a little to make everything fit smoothly. Despite that, this was a very valuable lesson that we learned that we will definitely take into consideration next time we use the 3D printer.